React Native v2 - Forms
前言
最近要轉換跑道學習開發 React Native,學習的課程是 Kadi Kraman 的 React Native v2 ,寫這篇筆記的時候是學習 React Native 的第三天,不知不覺到了這個課程的結尾,算是窺探了 React Native 的冰山一角,基本的 Component、簡單的 Navigation、基本的 Form 都在這個課程學到了,未來應該還有超長的路要走,祝我自己一切順利 QQ
話說,React Native 開發上我覺得算是好理解,至少 API 可以看文件,真正讓我感受痛苦的應該是 TypeScript,常常錯誤訊息看半天還是摸不著頭緒,不禁感嘆一袋米要扛幾樓,痛苦歸痛苦,最後還是完成課程惹,感人。
初學 React Native,概念上應該會有不少錯誤,如果有誤的話也麻煩不吝指正,非常感謝!
Overview of Forms in React Native
Overview of Forms in React Native
React Native 使用表單和 web 不同的地方是不用包裹在 <form> 裡面,這章節會簡單介紹幾個 input 如何使用。
TextInput
TextInput 大概是表單中最常用到的 Component,詳細的 API 可以參考:TextInput
TextInput 基本的四個 props:
style- adding some padding and a border color for the input to be better visible on the screen. The Text Input has no default stylesvalue- the current valueonChangeText- gets called with the new value whenever the user changes the content of the inputplaceholder- some placeholder text to be displayed when the input is empty
稍微玩了一下之後,發現很多 props 都挺有趣的,是平常使用 App 不會發現,因為一切都很直覺,但開始學習開發 App 之後才會注意到的細節。
舉例來說,clearButtonMode="while-editing" 這個 props 就是有時候輸入內容旁邊會出現的小叉叉按鈕,設置 while-editing 就是只有編輯的時候才會出現。
下面示範簡單的用法:
<TextInput
  style={styles.input}
  value={textValue}
  onChangeText={setTextValue}
  placeholder="Please input something"
/>
過程中有發現幾個和 web 不同需要注意的地方:
- 需要先寫好 style,不然不會顯示(Web 會有預設的樣式)
- Event handler 在 React 叫
onChange,RN 裡面叫作onChangeText - onChange 在 React 裡面通常都是
(e) => setValue(e.target.value)的寫法,不過看來 RN 裡面的第一個參數就是輸入的 value,所以可以直接把 setTextValue 放進去,不需要再另外宣告 callback
Number input
透過 keyboardType ,設置為 numeric 就可以在 focus 輸入框的時候,讓跳出的鍵盤變成輸入數字的鍵盤,對於 UX 來說是一個好 props。
這邊是兩個平台都可以使用的 value:
- default
- number-pad
- decimal-pad
- numeric
- email-address
- phone-pad
Password input
透過設置 secureTextEntry 這個 props 就可以讓輸入變成 mask 過後的內容,場景適用於輸入密碼時。
Multiline input
如果需要有多行的輸入,設置 multiline={true} 可以達到這個效果;如果要限制行數的話,可以使用 numberOfLines
🚧 Picker
注意!文件裡面寫到:
Deprecated. Use one of the community packages instead.
已經棄用了,所以可以改成在 React Native Directory 去尋找適用的 picker。
iOS 和 Android 的預設樣式不同,iOS 是一個滾輪,滑動的時候會有反饋;Android 則是一個 Modal。
其他
其他還有很多 components 可以使用,Kadi 建議我們去 React Native Community 和 React Native Directory 找適合的 library,他說通常除了看 star 以外,他也會注意 fork 的數量,因為這一定程度代表這個套件的熱門程度,還有 commit 時間也值得注意,因為這代表有沒有在維護。
這邊我會推薦使用 openbase 來做搜尋,library 的各種資訊在這裡都一目瞭然。
Opening a full screen modal
這章節的可以參考官方文件的 Opening a full-screen modal,以及 React Navigation 的 Combining navigation props。
首先這是我們預計要有的 Navigation Stack 樹狀圖:

也就是說,原本的 Stack 變為 MainStack,MainStack 負責導航到 HomeScreen 和 ColorPalette 兩個 Screen;更上層的 RootStack 則是負責 MainStack 的導航以及 ModalScreen 。
首先我們先來新增 ModalScreen,我們來去 screen 建立ColorPaletteModal.tsx:
import React from 'react'
import { View, Text } from 'react-native'

export default function ColorPaletteModal() {
  return (
    <View>
      <Text>Hello Color Palette Modal</Text>
    </View>
  )
}接下來到達我們的重頭戲,App.tsx,首先除了原本的 Stack 改為 RootStack 以外,也要新增 MainStack:
export type RootStackParamList = {
  Main: undefined
  ColorPaletteModal: undefined
}

export type MainStackParamList = {
  Home: undefined
  ColorPalette: TPalette
}

const RootStack = createStackNavigator<RootStackParamList>()
const MainStack = createStackNavigator<MainStackParamList>()
也別忘記兩個 Stack 型別的定義也不一樣,接著我們來新增 MainStackScreen ,這個 component 就是原本的 Stack:
const MainStackScreen = () => {
  return (
    <MainStack.Navigator>
      <MainStack.Screen name="Home" component={Home} />
      <MainStack.Screen
        name="ColorPalette"
        component={ColorPalette}
        options={({ route }) => ({ title: route.params.paletteName })}
      />
    </MainStack.Navigator>
  )
}
最後,把原本的 App.tsx的 stack 改為 RootStack,並且顯示 MainStack 以及 ModalScreen:
const App = () => {
  return (
    <NavigationContainer>
      <RootStack.Navigator mode="modal">
        <RootStack.Screen
          name="Main"
          component={MainStackScreen}
          options={{ headerShown: false }}
        />
        <RootStack.Screen
          name="ColorPaletteModal"
          component={ColorPaletteModal}
        />
      </RootStack.Navigator>
    </NavigationContainer>
  )
}
可以特別注意的是 <RootStack.Navigator> 設置了 mode="modal",這樣我們導航到其他 Screen 的畫面的行為才會是跳出 Modal。
接著我們到 Home.tsx 試著新增一個 Button,然後可以點擊 Button 跳出 ColorPaletteModal 吧!
// Home.tsx
import { FlatList, StyleSheet, SafeAreaView, Button } from 'react-native'

/* 中間省略 */

const Home = () => {
  return (
    <FlatList
      style={styles.container}
      data={colorPalettes}
      renderItem={renderPalettePreview}
      keyExtractor={(item) => item.paletteName}
      ListHeaderComponent={() => (
        <Button
          title="Press me"
          color="#f194ff"
          onPress={() => navigation.navigate('ColorPaletteModal')}
        />
      )}
      refreshing={isRefreshing}
      onRefresh={handleRefresh}
    />
  )
}
完成這邊的事情以後,彈窗的功能就順利完成!不過寫 TS 的時候會發現一件事情,那就是 Button 的 onPress={() => navigation.navigate('ColorPaletteModal')} 這行會出現 TS 的紅字錯誤,這是型別上出了什麼問題?讓我們移動到下一章節。
型別的定義
在這邊我卡了蠻久,不知道型別哪裡出了問題,到處找資料後發現 stackover flow 的這篇:
How to write type definitions while using nested navigation in react-navigation v5
這邊提及 React Navigation 的官方文件: Combining navigation props,直到這裡我才真正搞定型別,我們來看一下經過 Nested 的 Stack 後型別如何定義吧。
首先回到 App.tsx,我們要新增一個叫做 MainNavigationProp 的 type:
export type MainNavigationProp = CompositeNavigationProp<
  StackNavigationProp<MainStackParamList, 'Home'>,
  StackNavigationProp<RootStackParamList>
>
When you nest navigators, the navigation prop of the screen is a combination of multiple navigation props. For example, if we have a tab inside a stack, the
navigationprop will have bothjumpTo(from the tab navigator) andpush(from the stack navigator). To make it easier to combine types from multiple navigator, you can use theCompositeNavigationProptype
按照官方文件的解釋,應該是因為 nest navigators 會讓你的 prop 是多個 navigation props 的結合,因此需要再透過 CompositeNavigationProp 來把 props 的 type 結合。
接著回到 Home.tsx ,需要把 HomeScreenNavigationProp 的 type 改成這樣:
type HomeScreenNavigationProp = CompositeNavigationProp<
  StackNavigationProp<MainStackParamList, 'Home'>,
  MainNavigationProp
>
除了原本的 StackNavigationProp 以外,也要 combine MainNavigationProp。
這樣子就可以順利解決了!依然是感謝 React Navigation 的官方文件寫的很詳細。
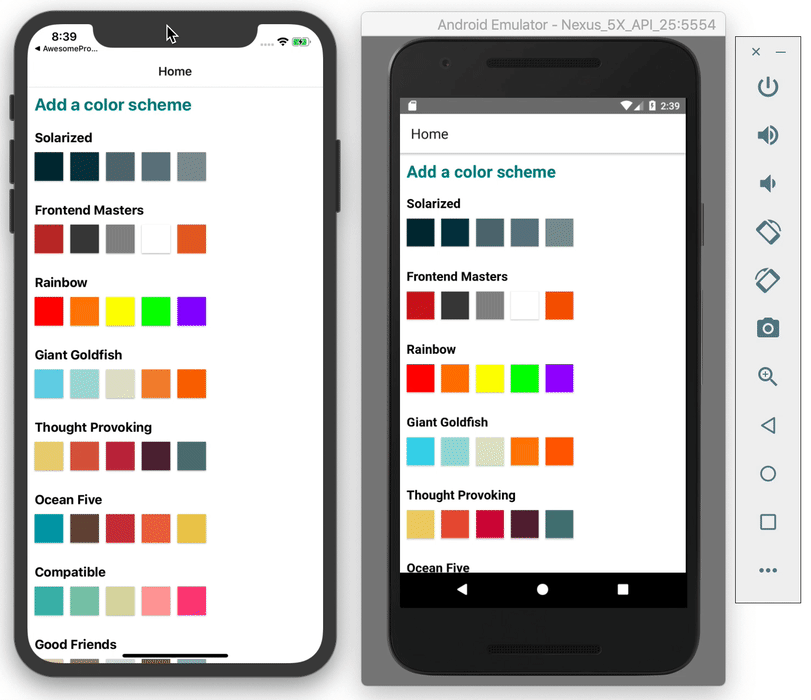
這時候我們點擊 Button 並跳出彈窗的行為大概會像是這樣:
Form exercise 📝
這章節的筆記會比較簡略,因為累惹,想要簡單記錄就好,簡單來說大概會做幾件事情:
- 調整 Home 的「Add a Color scheme」
- 新增 Modal 內容(Text,TextInput、Submit Button)
- 新增 Modal 的
handleSubmit功能 - 新增 Modal 的
renderToggleItem、handleUpdate功能 - 處理 Modal 的 type
- 處理 Home route 的 type 以及 route.params
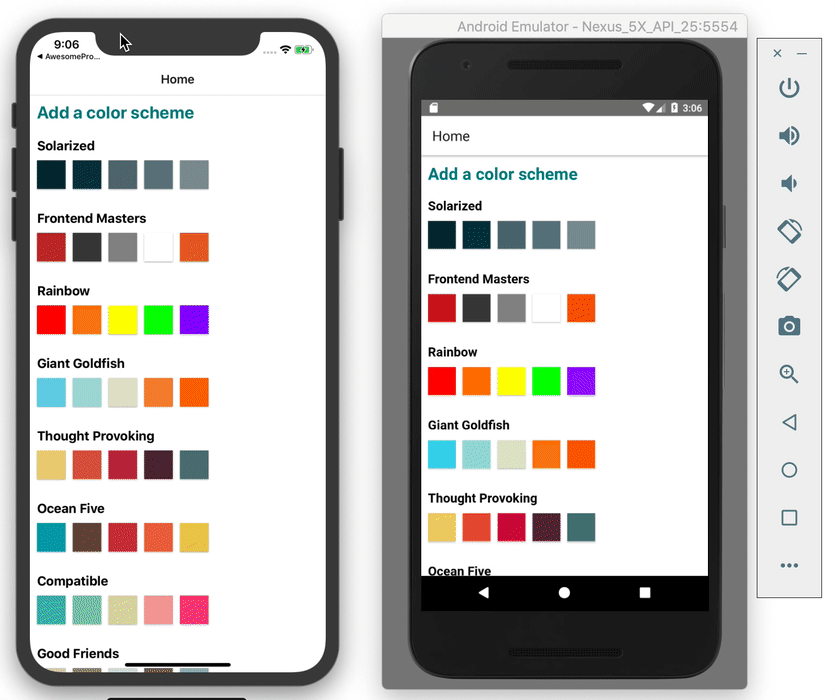
這是預計要實踐的畫面和功能:
Home.tsx 新增 Button
首先我們要做的是到 Home.tsx 新增 「Add a Color scheme」的 button:
;<FlatList
  style={styles.container}
  data={colorPalettes}
  renderItem={renderPalettePreview}
  keyExtractor={(item) => item.paletteName}
  ListHeaderComponent={() => (
    <TouchableOpacity onPress={handleOpenModal}>
      <Text style={styles.buttonText}>Add a color scheme</Text>
    </TouchableOpacity>
  )}
  refreshing={isRefreshing}
  onRefresh={handleRefresh}
/>

const styles = StyleSheet.create({
  container: {
    padding: 10,
  },
  buttonText: {
    fontSize: 18,
    fontWeight: 'bold',
    color: '#00A0B0',
    marginVertical: 15,
  },
})
新增 Modal 內容(Text,TextInput、Submit Button)
接下來就是重頭戲啦,來著手進行 Modal 裡面的功能實踐,首先來切個版,我們會發現畫面大概分成幾個區塊:
- 第一是「Name of your color palette」的
Text - 第二是輸入 palette name 的
TextInput - 第三是數個
Text+Switch的顏色選項,會使用FlatList,一個一個的選項則是用 renderItem 來細調。 - 第四是 Submit 的 Button
事不宜遲馬上就來切版,首先是 Text、TextInput 和 FlatList和 Submit Button:
export default function ColorPaletteModal({ navigation }: TProps) {
  /* 中間省略 */

  return (
    <SafeAreaView style={styles.container}>
      <Text>Name of your color palette</Text>
      <TextInput
        style={styles.textInput}
        value={name}
        onChangeText={setName}
        placeholder="Please input palette name"
      />
      <FlatList
        data={COLORS}
        renderItem={renderColorToggle}
        keyExtractor={(item) => item.colorName}
      />
      <TouchableOpacity style={styles.button} onPress={handleSubmit}>
        <Text style={styles.buttonText}>Submit</Text>
      </TouchableOpacity>
    </SafeAreaView>
  )
}

const styles = StyleSheet.create({
  container: {
    margin: 15,
    flex: 1,
  },
  toggleContainer: {
    flex: 1,
    flexDirection: 'row',
    alignItems: 'center',
    justifyContent: 'space-between',
    padding: 10,
    borderBottomWidth: 1,
  },
  textInput: {
    height: 45,
    padding: 10,
    borderRadius: 5,
    borderWidth: 1,
    marginVertical: 12,
  },
  button: {
    height: 50,
    paddingVertical: 5,
    paddingHorizontal: 10,
    backgroundColor: '#53777A',
    borderRadius: 5,
    alignItems: 'center',
    justifyContent: 'center',
  },
  buttonText: {
    fontSize: 18,
    fontWeight: 'bold',
    color: 'white',
  },
})
接下來輪到 renderItem 裡面的 renderColorToggle :
const renderColorToggle = ({ item }: { item: TColor; index: number }) => {
  return (
    <View style={styles.toggleContainer}>
      <Text>{item.colorName}</Text>
      <Switch />
    </View>
  )
}
到這邊我們的切版大致上就完成惹。
Modal 的 handleSubmit
接下來輪到 handleSubmit 的回合:
export default function ColorPaletteModal({ navigation }: TProps) {
  const [selectedColors, setSelectedColors] = useState<TColor[]>([])
  const [name, setName] = useState('')

  const handleSubmit = () => {
    if (!name) {
      Alert.alert('Please input palette name')
    } else if (selectedColors.length < 3) {
      Alert.alert('Please pick at lease 3 colors')
    } else {
      const newPalette = {
        paletteName: name,
        colors: selectedColors,
      }

      navigation.navigate('Home', { newPalette })
    }
  }

  /* 省略 */

  return (
    <SafeAreaView style={styles.container}>
      <Text>Name of your color palette</Text>
      <TextInput
        style={styles.textInput}
        value={name}
        onChangeText={setName}
        placeholder="Please input palette name"
      />
      <FlatList
        data={COLORS}
        renderItem={renderColorToggle}
        keyExtractor={(item) => item.colorName}
      />
      <TouchableOpacity style={styles.button} onPress={handleSubmit}>
        {' '}
        // 新增 Submit
        <Text style={styles.buttonText}>Submit</Text>
      </TouchableOpacity>
    </SafeAreaView>
  )
}
這邊的邏輯就是如果「沒有輸入 name」或是「選擇的顏色數量少於 3」就會跳出 alert,不然就會把新增的 newPalette 當作 params 傳到 Home Screen,並且導航到 Home。
Modal 的 renderToggleItem、handleUpdate
接下來輪到 renderToggleItem 和 handleUpdate 了:
export default function ColorPaletteModal({ navigation }: TProps) {
  const [selectedColors, setSelectedColors] = useState<TColor[]>([])
  const [name, setName] = useState('')
  /*
    這邊的邏輯是如果 value 為 true,代表從 false 變 true,代表要 push 新的 color 到
    array 裡面;
    但如果是 false,那代表原本是 true,也就是從選擇到取消,那就要從現有的 colors 裡面
    filter 掉。
	*/
  const handleUpdate = (value: boolean, color: TColor) => {
    if (value) {
      setSelectedColors((currentColors) => [...currentColors, color])
    } else {
      setSelectedColors((currentColors) =>
        currentColors.filter((c) => c.colorName !== color.colorName)
      )
    }
  }

  const handleSubmit = () => {
    if (!name) {
      Alert.alert('Please input palette name')
    } else if (selectedColors.length < 3) {
      Alert.alert('Please pick at lease 3 colors')
    } else {
      const newPalette = {
        paletteName: name,
        colors: selectedColors,
      }

      navigation.navigate('Home', { newPalette })
    }
  }
  /*
		這邊就是尋找目前 item 的 colorName 有沒有在 state 的 colors 裡。有的話就是已選擇的,		  		value 必須是 true,沒有的話就是 false。
	*/
  const renderColorToggle = ({ item }: { item: TColor; index: number }) => {
    const isActive: boolean = !!selectedColors.find(
      (color: TColor) => color.colorName === item.colorName
    )
    return (
      <View style={styles.toggleContainer}>
        <Text>{item.colorName}</Text>
        <Switch
          trackColor={{ false: '#767577', true: '#81b0ff' }}
          thumbColor={isActive ? '#f5dd4b' : '#f4f3f4'}
          ios_backgroundColor="#3e3e3e"
          onValueChange={(value) => handleUpdate(value, item)}
          value={isActive}
        />
      </View>
    )
  }

  return (
    <SafeAreaView style={styles.container}>
      <Text>Name of your color palette</Text>
      <TextInput
        style={styles.textInput}
        value={name}
        onChangeText={setName}
        placeholder="Please input palette name"
      />
      <FlatList
        data={COLORS}
        renderItem={renderColorToggle}
        keyExtractor={(item) => item.colorName}
      />
      <TouchableOpacity style={styles.button} onPress={handleSubmit}>
        <Text style={styles.buttonText}>Submit</Text>
      </TouchableOpacity>
    </SafeAreaView>
  )
}
Modal 的 type
因為我們的 Modal 要使用 navigate 這個 props 的緣故,所以必須定義它的型別:
import { CompositeNavigationProp } from '@react-navigation/native'
import { StackNavigationProp } from '@react-navigation/stack'
import { RootStackParamList, MainNavigationProp } from '../App'

type ModalScreenNavigationProp = CompositeNavigationProp<
  StackNavigationProp<RootStackParamList, 'ColorPaletteModal'>,
  MainNavigationProp
>

type TProps = {
  navigation: ModalScreenNavigationProp
}
Home 的 route type 以及 route.params
從 Modal 傳遞 newPalette 到 Home 以後,Home 就要來接住這個 newPalette 了,並且新增到目前的 COLOR_PALETTES 裡面了對吧!
首先我們到 App.tsx,原因是要先定義 Home 的 route.params 的 type:
// App.tsx

// 定義 Home 的 params
type HomeParams = {
  newPalette: TPalette
}

// 修改原本的 MainStackParamList
export type MainStackParamList = {
  Home: HomeParams
  ColorPalette: TPalette
}
其他依舊。
接下來回到 Home,因為我們現在又多了一個 route 的 props,所以依舊是要處理 route 的型別:
// Home.tsx

import { CompositeNavigationProp, RouteProp } from '@react-navigation/native'

type HomeScreenNavigationProp = CompositeNavigationProp<
  StackNavigationProp<MainStackParamList, 'Home'>,
  MainNavigationProp
>

type HomeScreenRouteProps = RouteProp<MainStackParamList, 'Home'>

type TProps = {
  route: HomeScreenRouteProps
  navigation: HomeScreenNavigationProp
}
接著就可以快樂使用 route.params 了!我們在 Home Component 裡面新增這行:
const newPalette: TPalette | undefined = route?.params?.newPalette接著新增一個 useEffect:
useEffect(() => {
  if (newPalette) {
    setColorPalettes((current) => [newPalette, ...current])
  }
}, [newPalette])
意思是當 newPalette 有變化且有值的時候,就更新 colorPalettes 的值。
完整的 Home.tsx 的 code:
import React, { useState, useEffect, useCallback } from 'react'
import { FlatList, StyleSheet, TouchableOpacity, Text } from 'react-native'
import { StackNavigationProp } from '@react-navigation/stack'
import { CompositeNavigationProp, RouteProp } from '@react-navigation/native'

import { MainStackParamList, MainNavigationProp } from '../App'
import PalettePreview from '../components/PalettePreview'
import { TPalette } from '../utils/colors'

type HomeScreenNavigationProp = CompositeNavigationProp<
  StackNavigationProp<MainStackParamList, 'Home'>,
  MainNavigationProp
>

type HomeScreenRouteProps = RouteProp<MainStackParamList, 'Home'>

type TProps = {
  route: HomeScreenRouteProps
  navigation: HomeScreenNavigationProp
}

export default function Home({ navigation, route }: TProps) {
  const [colorPalettes, setColorPalettes] = useState<TPalette[]>([])
  const [isRefreshing, setIsRefreshing] = useState(false)
  const newPalette: TPalette | undefined = route?.params?.newPalette

  const fetchColorPalettes = useCallback(async () => {
    const result = await fetch(
      'https://color-palette-api.kadikraman.now.sh/palettes'
    )

    if (result.ok) {
      const colors = await result.json()
      setColorPalettes(colors)
    }

    return result
  }, [])

  const renderPalettePreview = ({ item }: { item: TPalette }) => {
    return (
      <PalettePreview
        handlePress={() => navigation.navigate('ColorPalette', item)}
        colorPalette={item}
      />
    )
  }

  const handleRefresh = async () => {
    setIsRefreshing(true)
    await fetchColorPalettes()

    setTimeout(() => {
      setIsRefreshing(false)
    }, 1000)
  }

  const handleOpenModal = () => {
    navigation.navigate('ColorPaletteModal')
  }

  useEffect(() => {
    fetchColorPalettes()
  }, [fetchColorPalettes])

  useEffect(() => {
    if (newPalette) {
      setColorPalettes((current) => [newPalette, ...current])
    }
  }, [newPalette])

  return (
    <FlatList
      style={styles.container}
      data={colorPalettes}
      renderItem={renderPalettePreview}
      keyExtractor={(item) => item.paletteName}
      ListHeaderComponent={() => (
        <TouchableOpacity onPress={handleOpenModal}>
          <Text style={styles.buttonText}>Add a color scheme</Text>
        </TouchableOpacity>
      )}
      refreshing={isRefreshing}
      onRefresh={handleRefresh}
    />
  )
}

const styles = StyleSheet.create({
  container: {
    padding: 10,
  },
  buttonText: {
    fontSize: 18,
    fontWeight: 'bold',
    color: '#00A0B0',
    marginVertical: 15,
  },
})
這樣就順利完成新增 colorPalettes 的功能了!(不過 refresh 新增的東西就不見了,看來沒有把新增的 color palette 發給 API 還是有點小怪啦)
useState Type 小筆記
在練習過程中有遇到一些 TypeScript 的小問題,就先記在這裡。
Typed useState with TypeScript
What is “not assignable to parameter of type never” error in typescript?